SOFT IDLI RECIPE
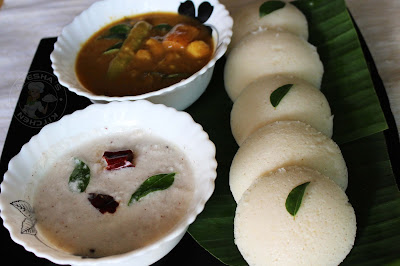
This post shows you how to make a perfect idli batter in an idli grinder/mixer grinder. This healthy Indian breakfast is something very special breakfast recipe for most of us, especially South Indians. Soft and fluffy idli along with a sweet chutney makes us drool. As the idli batter requires time for fermentation, this recipe is not a quick breakfast idea. The dish Idli is one of the traditional South Indian breakfast recipes which is served along with any condiment considered as essential. So Idli is commonly accompanied by sambar and chutney. Nowadays we can see many variations and types of idlis which are even very hard to get the exact ingredients and is prepared with different methods of cooking too. Rather than a stovetop steamer( idli cooker/idli steamer), microwave and automatic electric steamers with the nonstick coating are also available. Semolina / Rava idli recipe, Ragi idli recipe, carrot idli, wheat flour idli are common nowadays instead of rice idli recipe. A variant of idli known as sanna is very popular among Goans and Konkani people. Enduri Pitha is another variant which is popular in Odisha. So here, let's have a look at the traditional idli recipe with dal and idli rice. Please check the notes given below for the tips of making soft idli. Hope this will guide you to a soft fluffy idli recipe. Here is the recipe showing how to make idli / vegan breakfast recipe / healthy Indian breakfast / how to make idli batter. Please drop your valuable feedback in the comment box below.
You can check my rava idli recipe here
INGREDIENTS
For IDLI batter
Idli rice - 2 cups, flat
Urad dal - half a cup
Chana dal / kadala parippu / bengal gram - 4 tbsp
Fenugreek seeds - 1 tsp
Cooked rice / steamed rice - half a cup
Salt as required
(For best result, you must use the above said idli rice even though you can substitute it with parboiled rice / pachari. Idli rice is available in almost all supermarkets)
PREPARATION
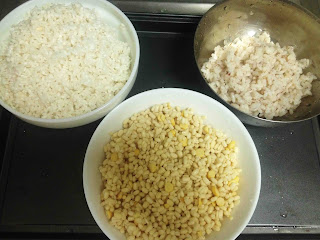
- SOAKING ...Wash well and then soak idli rice in a bowl. Urad dal, fenugreek seeds, Bengal gram in another bowl with enough water for 5 hours.
- GRINDING...After 5 hours, GRIND the soaked urad dal - bengal gram - fenugreek seeds with cold water. Use required water for grinding the dal (not more but minimum water is required for grinding).When it becomes smooth and fluffy, add the cooked rice to it and again GRIND the cooked rice well to make a smooth batter. Transfer it to a vessel.
- Now GRIND idli rice until smooth by adding little by little water (do not add more water at a time). You can grind it in batches for making a smooth batter.
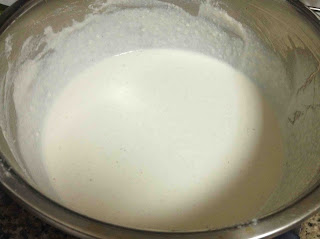
- Transfer it to the above vessel and mix both the batters together along with salt WITH YOUR HAND. It is very important for making soft idlis. Leave it overnight for fermentation. (required minimum 8 hours in summer and it differs according to the climate. Allow 10 - 12 hours for fermentation for the best result ).
- Next day the batter will rise.
STEAMING / MAKING OF IDLI
- Now grease the idli molds.
- Pour the batter into the molds with a ladle. Always pour the batter only 3/4 of each mold.
- Steam the idlis in a pressure cooker or in a steamer.
- If you are using pressure cooker.............boil a cup of water in it, once it starts to boil keep the molds inside it and you have to remove the whistle/vent weight of the pressure cooker.
- Steam it for 15 minutes or until done.
- Take out the molds and let it stay for 5 minutes. And then take the idlis out from the mold using a spoon. If you are using nonstick idli mold please skip this step.
- Serve hot with any CHUTNEYS - Coriander chutney, Coconut chutney, Garlic chutney, Tomato chutney and Sambar with sambar powder , Sambar without sambar powder..
SECRET OF SOFT IDLIS
- You have to use the correct proportion of idli rice and dal. The ratio depends upon the quality of Dal u used. Adding more quantity of good dal makes ur idli flat and small. Likewise less quantity of good dal makes hard. So use correct proportion of good dal always.
- Idli rice is good for making idli than Parboiled rice / pachari.
- Use fresh urad dal. You can also use split urad dal.
- Fenugreek seeds help in fermentation. So do not skip this. Soak it along with urad dal for good fermentation.
- Cooked rice gives a very soft texture to the idli. You can also add white rice flakes instead. Soak rice flakes / poha for 15 minutes and then grind it along with other ingredients.
- Grind with minimum required water. You must grind urad dal with enough water for grinding it to smooth and fluffy. Adding required water at the time of mixing the batter will not work.
- While grinding urad dal there is a chance of getting the machine hot which results in a yellowish idli. So add cold water while grinding urad dal mixture or give resting time for the grinder in between. For best result, use cold water while grinding.
TIPS FOR GOOD FERMENTATION
- Use your hand for mixing the dal mixture and rice mixture which works well. Mix well. Uneven mixing will result in bad idlis.
- Fermentation time is 10 - 12 hours for best results. 8 hours will do, but it will not give you a perfect idli.
- A warm temperature is an essential part of fermentation. If the weather is cold, you can add little baking soda (quarter tsp) to the ground batter and then ferment which helps in raising the batter well even in cold weather.


